How to Setup environment variables using JSON files with Rollup and TypeScript
Originally published at labs.thisdot.co
Feb 1, 2021 · 6 minutes read · Follow @luixaviles
In previous posts, I explained How to setup a TypeScript project using Rollup.js from scratch. Also, I covered How to Serve a Single Page Application(SPA) using Rollup.js and Web Dev Server step by step. Then, I covered How to Build a LitElement Application with Rollup.js and TypeScript.
In this article, I’ll take the result of those tutorials as a starting point to set up environment variables using JSON files.
Environment Variables
Reading environment variables is very common in software development. It’s a helpful way to cover security concerns and even provides the convenience to set configuration parameters in your application.
For example, in the Node.js world yo may need to set the port number to serve your application. For example:
const app = require('http').createServer((req, res) => res.send('Hello world'));
const PORT = process.env.PORT || 3000;

app.listen(PORT, () => {
  console.log(`Server is ready to listen on port ${PORT}`);
});
In the previous code, the app will read the value of PORT through process.env.PORT. If the value doesn’t exist, it will take 3000 as a fallback.
JSON Modules
In today’s JavaScript world, it’s possible to read JSON Modules as follows:
import config from '../../config.json';
Also, recent versions of Node.js enables the use of --experimental-json-module flag for the module to work.
Let’s explore a practical way to add the same support to the current Single-Page Application which is based on TypeScript, LitElement, Rollup.js, and Web Dev Server.
Project Setup
Base Project
Let’s create a clone or download the project seed before adding the new configurations and tools:
git clone https://github.com/luixaviles/typescript-rollup.git
cd typescript-rollup/
git checkout tags/03-build-litelement -b 04-env-config-json
The previous commands will download the project and create a new branch 04-env-config-json to get started.
Source Code Files
The previous project already contains a set of files and configurations ready to configure and support JSON Modules. Open it with your favorite code editor and take a look at the project structure:
|- typescript-rollup
    |- src/
        |- math/
            |- math.ts
            |- index.ts
        |- string/
            |- string.ts
            |- index.ts
        |- main.ts
    |- index.html
    |- package.json
    |- rollup.config.js
    |- tsconfig.json
    |- web-dev-server.config.js
Installing Rollup Plugins
Since the Single-page application considers Rollup.js as the module bundler, we’ll need to install a couple of node modules first:
npm install --save-dev @rollup/plugin-json @web/dev-server-rollup
- @rollup/plugin-json will be in charge to convert
.jsonfiles to ES6 modules. - @web/dev-server-rollup is an adapter for using rollup plugins in Web Dev Server, which is used to “serve” the web application in development mode.
The package.json file should have the new dependencies listed as follows:
{
  ...
  "devDependencies": {
    ...
    "@rollup/plugin-json": "^4.1.0",
    "@web/dev-server-rollup": "^0.3.2",
    ...
  },
}
Reading the JSON Configuration
Let’s add the following env-config.json file into the root of the project:
{
  "environment": "production",
  "host": {
    "protocol": "http",
    "hostname": "localhost",
    "port": 8080
  }
}
Of course, you can set your variables according to the requirements: access keys, platform, etc.
Since you may have sensitive data in that file, it should not be versioned in any case. Then, it’s good practice add it to the .gitignore file:
# Environment variables
env-config.json
Also, you can provide a env-config.json.example file as an example, so that developers, Dev Ops, or any member of the team can create a configuration file from it:
{
  "environment": "development",
  "host": {
    "protocol": "http",
    "hostname": "localhost",
    "port": 8080
  }
}
Creating the TypeScript Model
It’s time to define the TypeScript model for our configurations. First, let’s create a src/environment/environment-model.ts:
// environment-model.ts
export interface Host {
  protocol: string;
  hostname: string;
  port: number | string;
}

export interface EnvConfig {
  environment: string;
  host: Host;
}
Next, create a src/environment/environment.ts file with the following content:
import { EnvConfig } from './environment-model';
import envConfig from '../../env-config.json';

export const env = envConfig as EnvConfig;
From now on, the configurations will be available in the env variable.
TypeScript Configuration
You may see a couple of compilation errors from TypeScript after adding the environment.ts file. To avoid them, it’s required to add new compiler options in the tsconfig.json file:
{
  "compilerOptions": {
    ...
    "resolveJsonModule": true,
    "allowSyntheticDefaultImports": true
  }
}
Why these changes are needed?
- The resolveJsonModule flag allows the compiler include modules with
.jsonextension - The allowSyntheticDefaultImports flag allows default imports from modules with no default export. As the documentation says, it’s just type checking.
Reading Configuration Values
Let’s read the configuration values to be rendered into existing web component. Update the main.ts file with the following content:
// main.ts
import { LitElement, html, customElement, css, property } from 'lit-element';
import { env } from './environment/environment';

@customElement('comp-main')
export class CompMain extends LitElement {
  static styles = css`
    :host {
      display: flex;
    }
  `;

  @property({ type: String }) message: string = 'Welcome to LitElement';

  render() {
    return html`
      <div>
        <h1>${this.message}</h1>
        <span>This App uses:</span>
        <ul>
          <li>TypeScript</li>
          <li>Rollup.js</li>
          <li>es-dev-server</li>
        </ul>
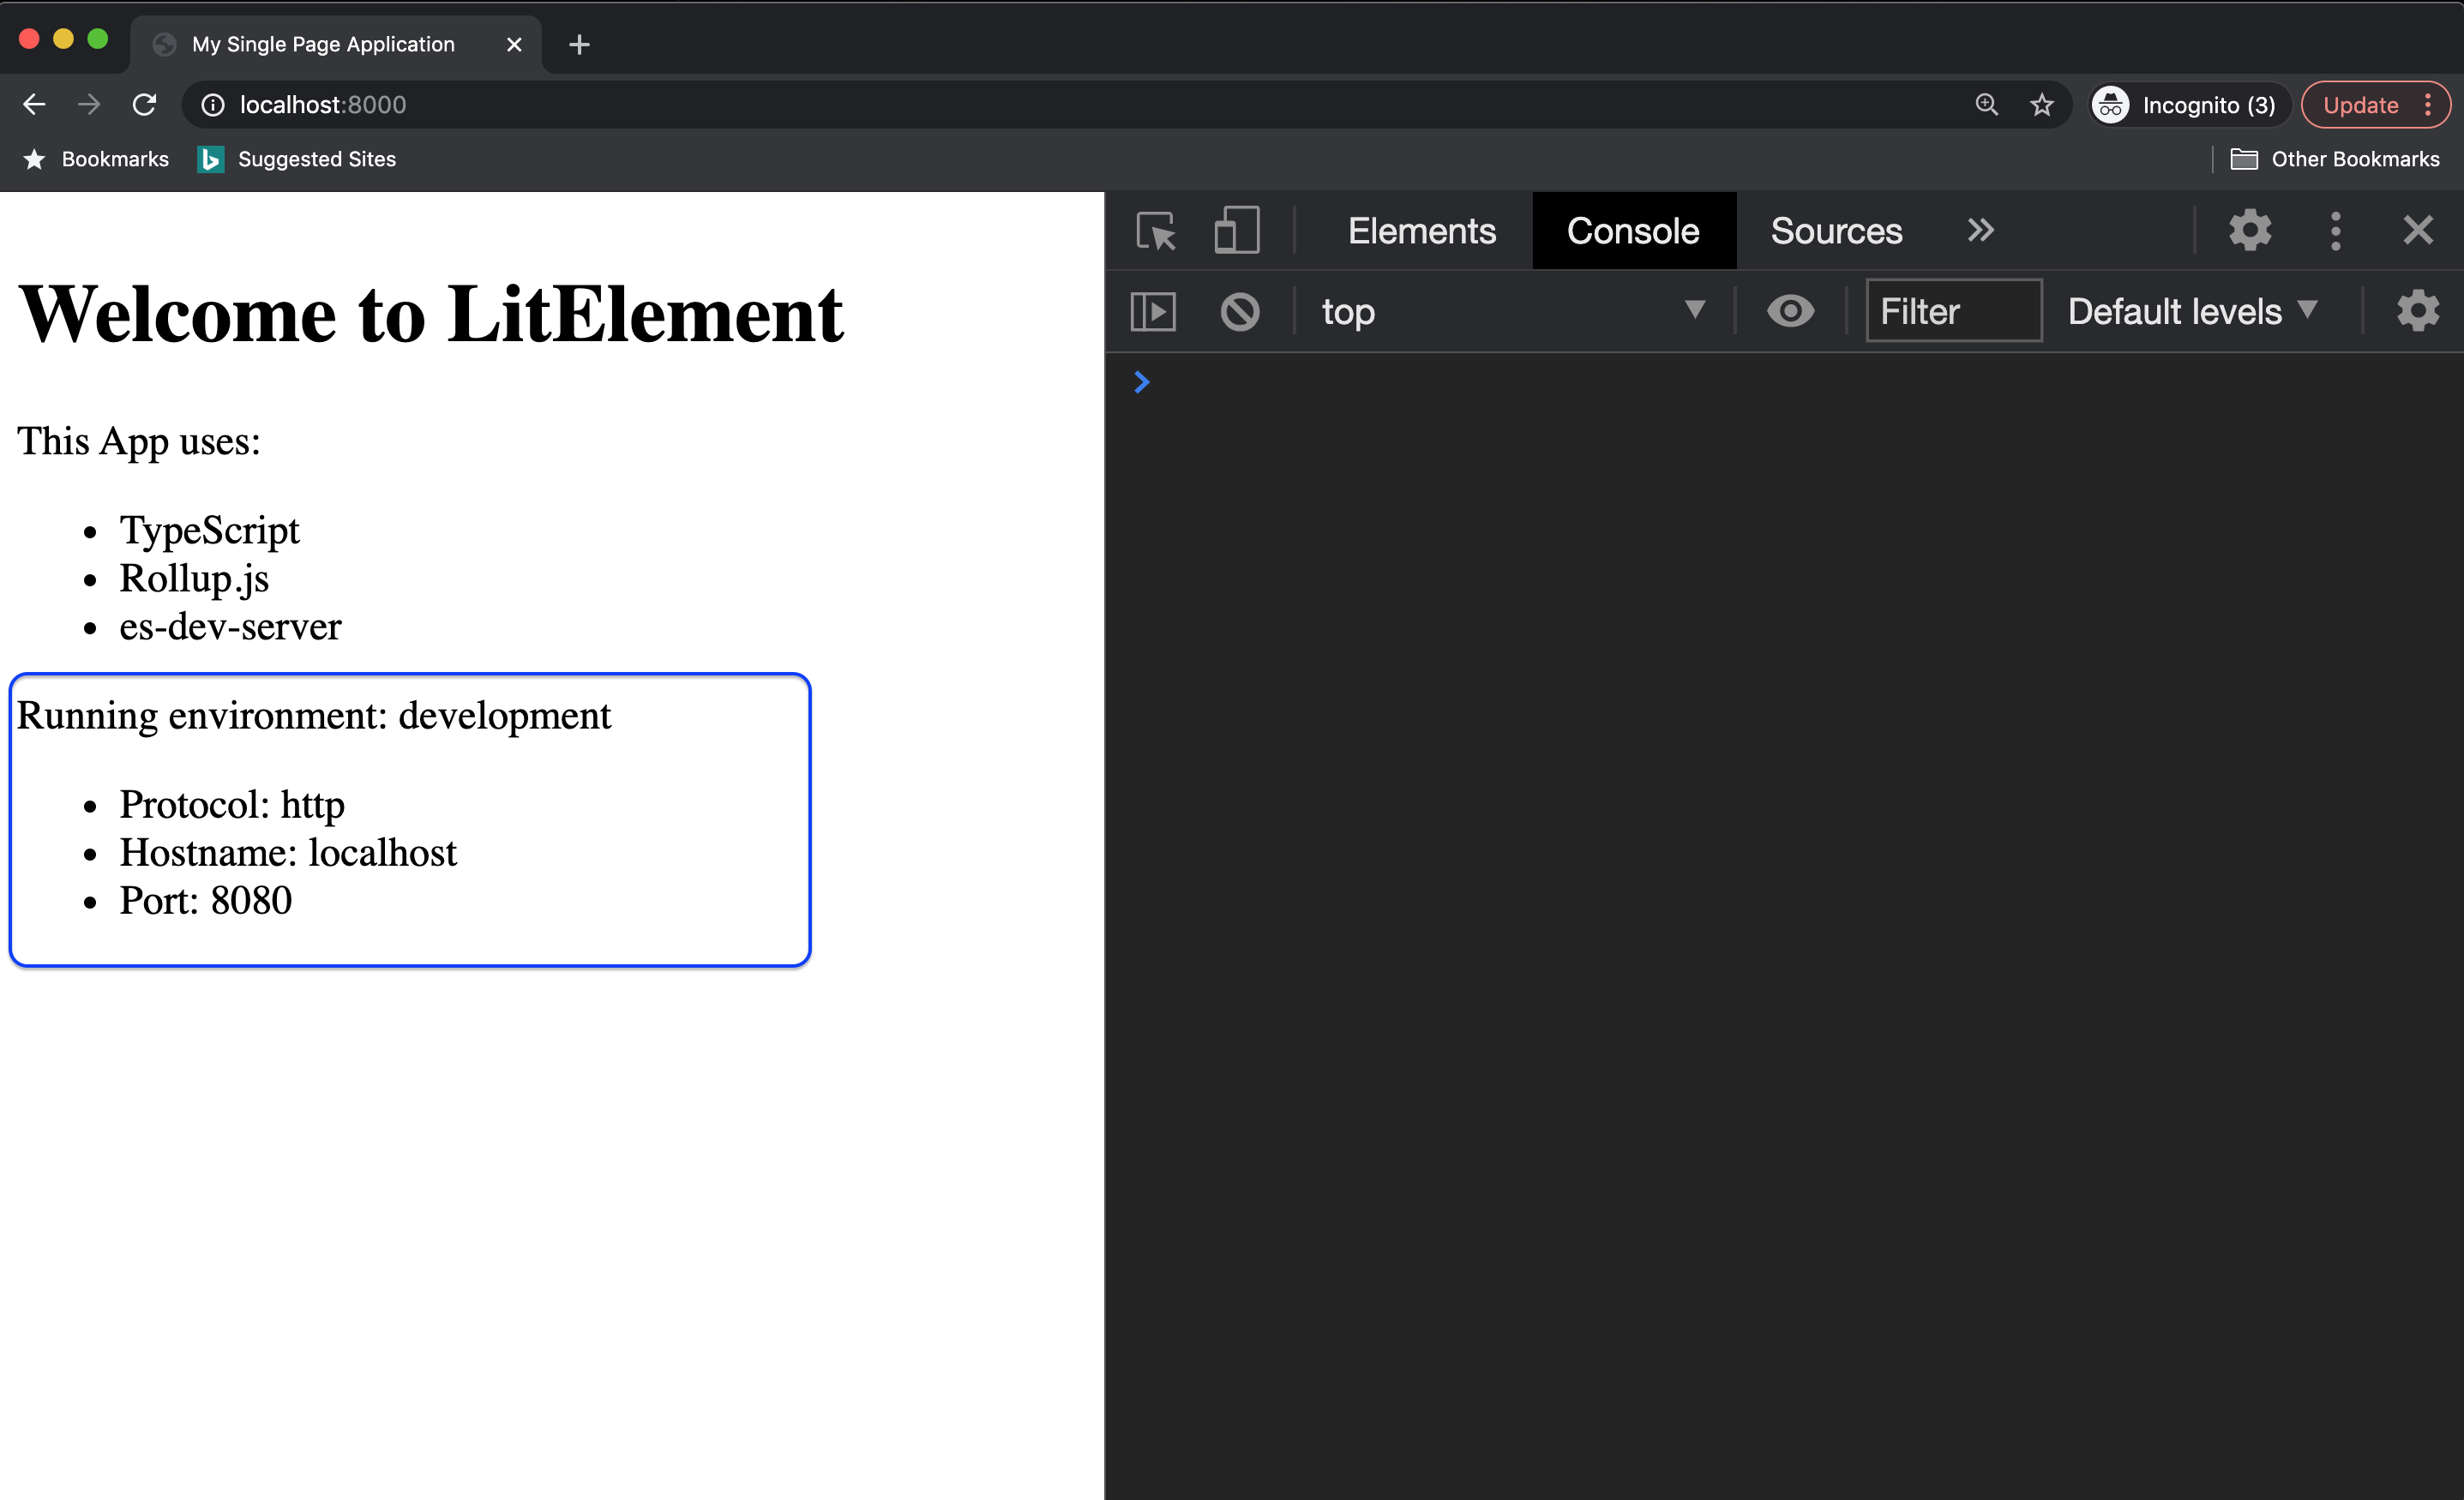
        <span>Running environment: ${env.environment}</span>
        <ul>
          <li>Protocol: ${env.host.protocol}</li>
          <li>Hostname: ${env.host.hostname}</li>
          <li>Port: ${env.host.port}</li>
        </ul>
      </div>
    `;
  }
}
Just pay attention to the import line: import { env } from './environment/environment'. Then the EnvConfig object(TypeScript model) will be available as the env variable.
Rollup Configuration
As stated above, the project is already configured and it uses Rollup as the module bundler. Let’s move forward to allow reading the JSON content for the build.
// rollup.config.js
import merge from 'deepmerge';
import { createSpaConfig } from '@open-wc/building-rollup';
import json from '@rollup/plugin-json';

const baseConfig = createSpaConfig({
  developmentMode: process.env.ROLLUP_WATCH === 'true',
  injectServiceWorker: false,
});

export default merge(baseConfig, {
  // any <script type="module"> inside will be bundled by rollup
  input: './index.html',
  plugins: [json()],
});
For every building process, the new json() plugin will be in charge to process the .json files. You can call any other Rollup plugin in the plugins array.
Web Dev Server Configuration
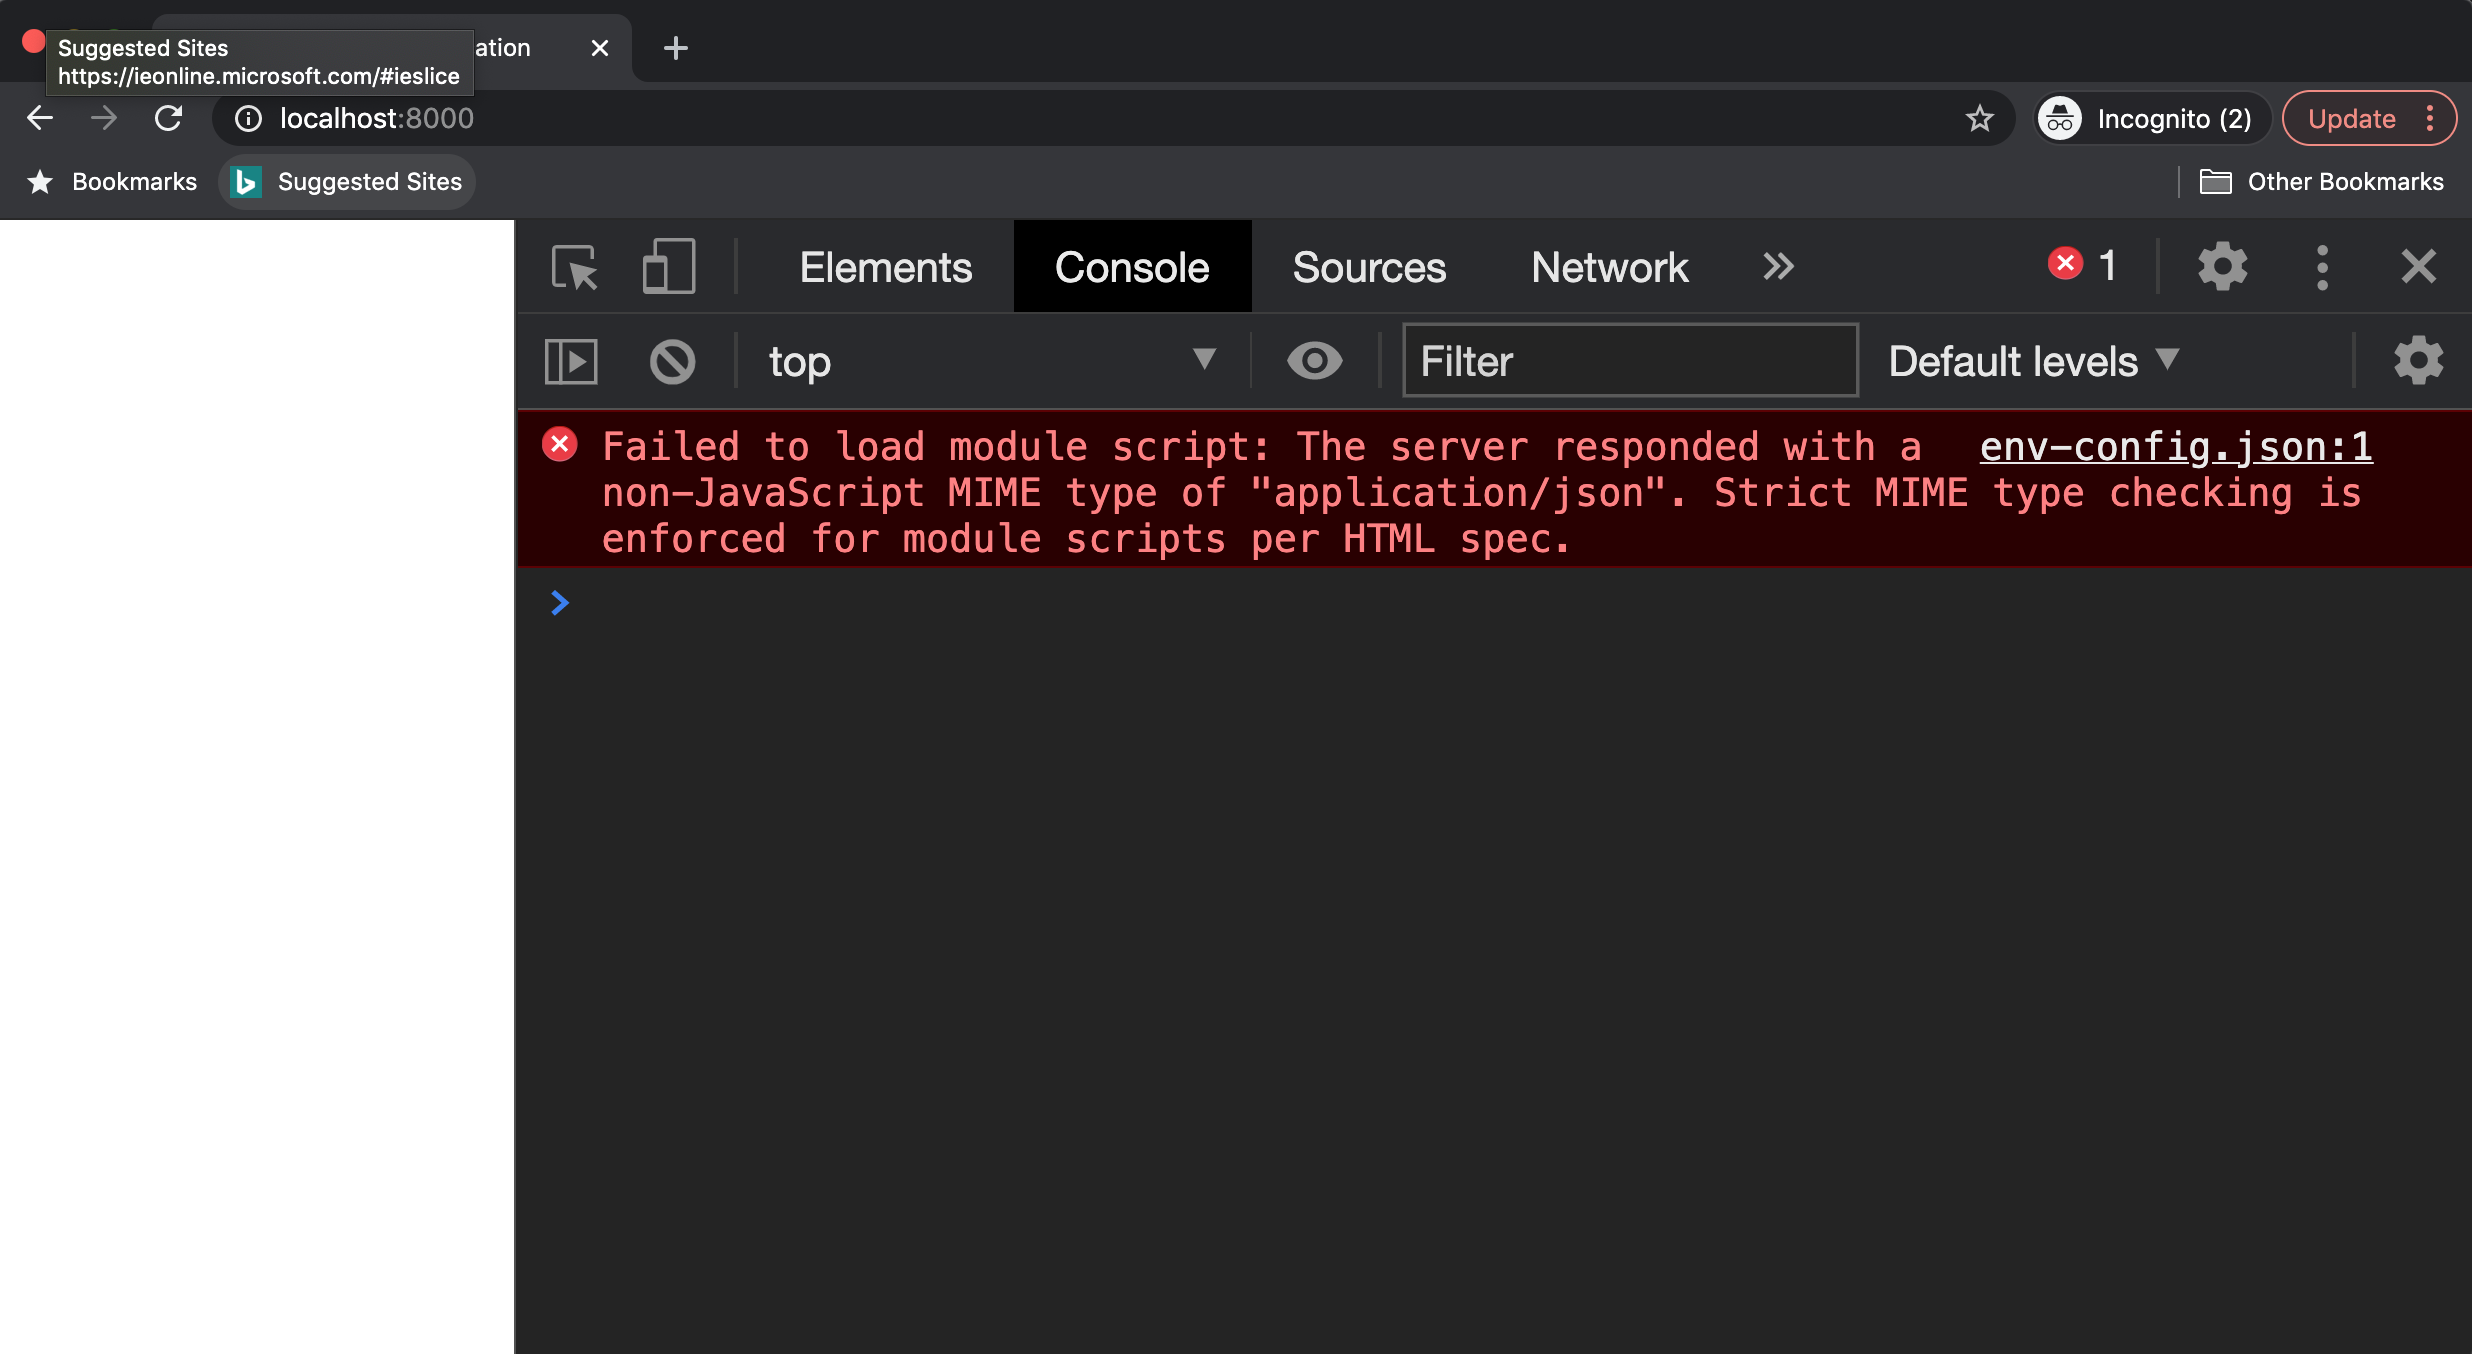
If you try to serve the application at this point, you’ll find a blank page and some errors in the browser’s console:
Failed to load module script: The server responded with a non-JavaScript MIME type of "application/json".
Strict MIME type checking is enforced for module scripts per HTML spec.

That is because we configured Rollup for the build process only. However, for serving the app in a “development mode”, we’re using Web Dev Server.
Let’s apply a couple of changes in the web-dev-server.config.js file to fix it:
// web-dev-server.config.js

const { rollupAdapter } = require('@web/dev-server-rollup');
const json = require('@rollup/plugin-json');

module.exports = {
  port: 8000,
  nodeResolve: true,
  open: true,
  watch: true,
  appIndex: 'index.html',
  mimeTypes: {
    // serve all json files as js
    '**/*.json': 'js',
  },
  plugins: [rollupAdapter(json())],
};
Let’s explain what’s happening in that code:
- The
@web/dev-server-rolluppackage allows using Rollup plugins in Web Dev Server. - Instead of using
json()plugin directly, it’s needed to be passed through therollupAdapterfunction first.
When you’re done with those changes, run again npm run start to see the final result.

Source Code of the Project
Find the complete project in this GitHub repository: typescript-rollup. Do not forget to give it a star ⭐️ and play around with the code.
Feel free to reach out on Twitter if you have any questions. Follow me on GitHub to see more about my work.